
Are you new to skateboarding and wondering how to stop on a longboard? It is a common issue faced by beginners. This is where sliding helps. Riding a longboard without knowing how to slide is like driving a car without a brake.
Longboard tricks are cool but sliding is essential. Sliding is also fun and cool to many riders.
I used to wonder if I could ever slide while looking at those cool sliding videos on YouTube. It took me some time to get a grip on those techniques but it was worth it.
Before heading to the techniques on how to slide on a longboard, I will start with some basics like the setup, requirements, and more. After that, there are step-to-step guidelines for some popular longboard slides. I will also give some long-boarding tips for beginners.
What is Sliding?
Technically, it is a frictional motion. It takes place between two objects that are in contact with each other and at least one of them is in motion.
The purpose of sliding while riding a longboard is to make enough friction to stop or minimize the speed of the longboard. Oversteering is another result of sliding. You can over-steer until you think you have slowed down enough and then regain the pace.
Riders need to slide basically for three reasons- emergency stopping, scrubbing speed, and fun. There are multiple sliding techniques to choose from. You can try all the longboard slides to pick up the easiest one for you.
Before learning how to slide on a longboard you should have some basic necessary gears like:
- Longboard slide gloves: These gloves have plastic pucks on them. They provide extra grip and protect from heat or particles on the road while sliding.
- Helmets: Helmets are important in all forms of riding for safety.
- Slide wheels: The best wheels for sliding are the stone-ground ones. Smooth-surfaced wheels eventually wear out and form more grip but stone-ground ones are built in that way. The harder wheels with more durometer are the best for beginners.
- Rough clothes: Learning sliding for the first time can take some effort and clothes! So, it is better to put on clothes that you do not mind tearing.
- Safety pads: Knee and elbow pads are basic safety measures.
We had to learn to crawl before we could walk. You need to start from the basics to master any process. Similarly, for learning how to slide on a longboard you should first learn the basics. And the basics include:
- Carving: I am sure you all have seen carving be it on the street, water, or ice. The fluent riding style, where the rider takes successive turns back and forth making it look like an S is called carving. It is fluent and soothing to watch as the rider does not even need to use his foot for the push.
For sliding, you need to learn how to carve hard. Carving hard creates more friction. It is like one step away from sliding. So, if you can carve hard sliding is a piece of cake for you.
- Hand drag carves: Many sliding techniques require hand drags. Hand drag carves help you adapt to the body position you need while sliding. Carving with your hands down is a good practice before sliding. If you can sit down fluently while sliding and do a 180-degree turn with your hands down, you are all set for sliding.
- Getting “in the box”: You might have heard this before if you any skating experience. You should be able to squat on your longboard comfortably for a smoother sliding experience. Getting in the box refers to the tuck-knee crouch position.
To get in this position, bend both your knees and keep them approx. shoulder-width apart. Bring the front foot forward and lay the back knee towards the shrine of the front foot. Your front knee should be facing upward. How much you should lay depends on your body type.
Once you get in the box, practice carving that way. Practice in both directions. Both getting in and out of the box is necessary to learn. So practice standing up from that position as well.
Practicing all these before learning to slide can make your job a lot easier. Other than these, you can practice kicking out, hooking up, foot positioning, etc.
Now that we are done with the basics, let us start the different longboard slides and how to do it.
Types of Longboard Slides:
Coleman Slides:
It is the first slide learned by most riders. It was named after its creator, Cliff Coleman.
It is a 180-degree heel slide. It is a great sliding technique if you need to stop short looking good. Any skateboarder can master this technique with a little bit of practice and a slide glove!
This slide requires crouching and hand dragging. For learning this slide, it is better to start on a flat surface like a road or parking lot.
- Start with a moderate speed. Not so fast, not so slow. If you are too slow, you won’t be able to slide in the first place. It is not impossible to slide if you are too fast. But it takes a lot of experience and practice to ace a slide at a fast speed.
- Place both your feet at each end on the longboard and keep them around shoulder-width apart. Slightly bend your knees at the start.
- Now crouch down on your board and roll your back foot. Basically, you unweight your board by leaning forward. Here, you can use the get in the box technique to crouch comfortably. Finally, get ready to slide.
- Keep your front hand on the road (make sure you have slide gloves on). Keep leaning forward when you keep your hand on the road.
- Now for the other free hand, different riders have a different process. The inventor of the slide, Cliff Coleman, instructs to use the free arm to swing for the board to get in that direction. The harder you swing, the more the board will turn. But beginners usually hold the rail of the longboard between the legs with this hand to do the heel slide. Either way, it works.
- Put some weight on the hand at the road. That hand is now facing in the opposite direction of your toes. Swing your free arm or hold your board as it begins to carve. The plucks on the gloves will provide friction against the road to stop the board.
- If it goes right, you will be looking at the road from the back of your shoulder. Your board should drift in a 900 to stop the board.
Do not reach too far back while placing your hand on the road. You will end up falling on your bum! This slide reduces your speed enough to stop. You can hold onto the slide as long as you want. The longer you slide, the more speed it will reduce.
Stand-up Slides:
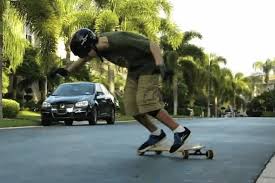
Any slide that does not require a hand is a sort of stand-up slide. Stand-up slides are the most common slides to stop. However, it can get a lot tricky for beginners. As you are not using your hand for the grip, balancing and following the techniques become vital. Follow the step-to-step guide to do a stand-up slide-
- Build up some momentum or speed to slide.
- The setup carve.
- Place both your front and rear foot in such a way that they are on the heel side of the board.
- Now shift your body weight from rare foot to front. And use the backside of the board to move it in the direction you want to slide. It is like hard carving.
- If done right, the board should slide in the direction you pushed it. The most important part of stand-up slides is to maintain balance when the board glides over the pavement. It can get hard as it is to be done without the help of your hand. But eventually, you will be able to do it with some practice.
Pre-drift Slides:
The pre-drift slides are a sort of hands-down slides. Riders usually do this slide before doing a turn. This slide prevents over-steering while taking a turn into another lane or off-road. It reduces speed enough to make the turn safely. For pre-drifts, you need to slide as usual.
The main difference between the pre-drift slide from the other slides is the angle. Keep the board and the slide under 900. This angle provides maximum friction and also lets the wheels slide evenly.
On the contrary, if you slide at 90 degrees, that will wear off your wheels. At 90 degrees, only one side of the wheel slides, and thus only that side wears off. This causes the wheels to turn into oval shape or in the worst-case scenario, causes flat-spotting. The wheels become totally flat if that happens.
Also sliding at less than 90 degrees leaves the scope to turn and steer the board in any direction you want. This helps to take a turn better.
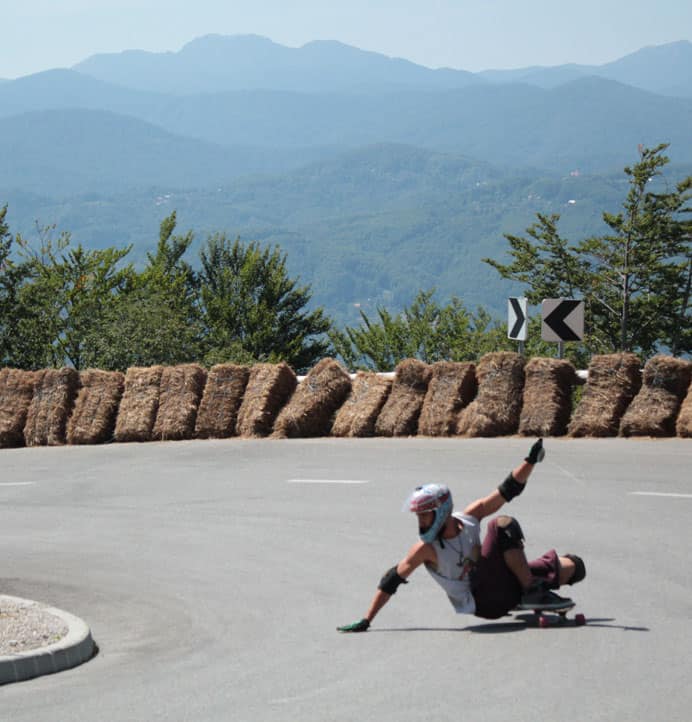
Hands-Down Slides:

In Hands-Down slides, the rider places both hands on the group to get the grip and stop. It is also a toeside slide. All hand-down slides require slide gloves.
Coleman slide is also a sort of Hands-Down slide. They are easier for most riders than stand-up slides. Because using a hand provides a lot more stability. Balancing is not really easy for many skateboarders. But eventually, you need to learn balancing without using your hand.
Toe-sideSlides:

The toe-side slide is also called the Backside Pendulum Slide. It is similar to that of Coleman’s slide. For the name, you can say it concentrates more on the toe while sliding. However, there are other things to consider to get this right.
- Start off with speed. It might sound scary, but it is important for this slide. Do not forget to wear your helmet.
- Bend your knees slightly and keep your weight on the center of the board.
- Hang the toes of your back foot slightly over the rail of the board.
- Do the setup carve along the side you want to do the slide. This will make you ready for the upcoming slide.
- Now crouch like the Coleman Slide. Keep your body weight as forward as possible.
- Choose the spot on the pavement where you want to place your hand.
- Use another hand to grab the rail if you prefer it that way or keep it free.
- Now place your back on the pavement in front and to the toeside edge of the board. While placing your hand on the front side of the road, you will notice that you are on the tiptoes of your back foot. That is the main trick of this slide.
- Now you can start the slide by two things- kick out with your back foot to break the grip and swing the free hand to control the direction. The kick-out is not really tough, as you are already hangout out your back toes on the rail of the board. Do not hesitate and give it a good kick.
- It is done. Now let it slide. It is the easiest and coolest part of any slide. But make sure that your body is twisted and you are looking down at the road straight. Keep the free hand behind you to maintain direction and balance.
You can bring it back by dropping your free hand and keep your back foot back in place. You can now roll away or stop any way you want.
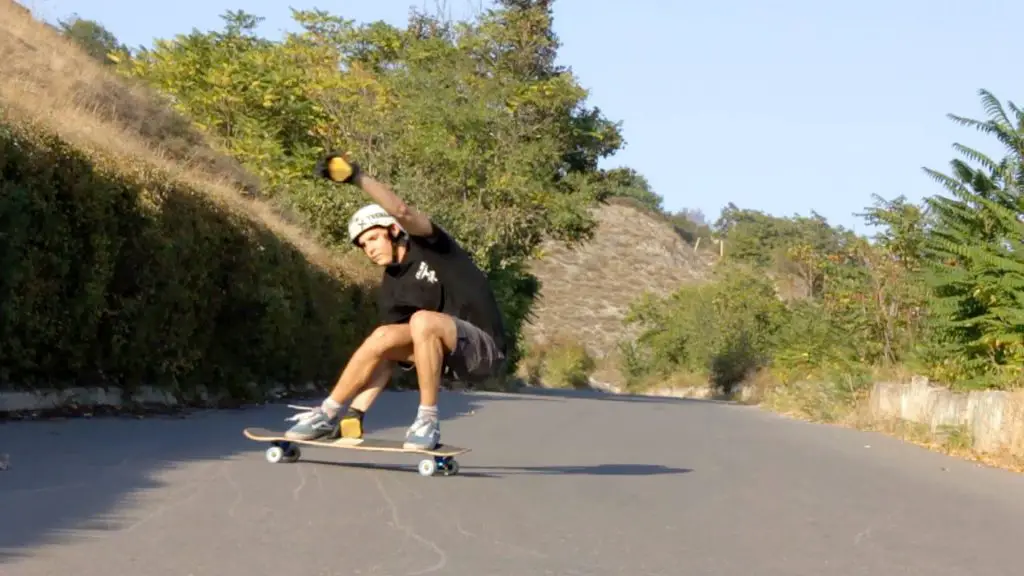
Heel-side/Front-sideSlides:

These slides are also called front slides because the slide directs to the front of the body. Any of the slides like Coleman or Stand up can be done with the heel sides.
The easiest way to start is the Front-side Stand-up 180 Slide. To do it-
- Do not start too fast. Keep your body weight on the center of the board and knees slightly bent.
- Carve across the other side of the pavement.
- Bend your knees, keep both of your feet flat on the board and turn your body and feet in the direction you want to slide.
- Initiate the slide by carving hard and lifting your body weight upward to unweight the board. Keep your front hand down and relaxed. Use the other hand to swing and rotate in the sliding direction.
- You can control this slide by leaning into your heel edge and making sure all four wheels are rolling. You can hold this slide as long as you want.
Now for the Front-side Power-slide-
- Start as the 180 Slide- knees slightly bent and weight centered on the board.
- Keep your weight on the heel edge and get lower.
- Start carving hard and straighten your leg suddenly to lift your body weight and unweighted the board.
- Use your front foot to accentuate and back foot to kick out.
- Push with your front foot to get all the four wheels sliding.
- Stand as if your upper body is on the backseat and your front foot is doing all the pushing. It takes a lot of force.
Switch Slides:
A switch is basically boarding by the feet that you are not used to or comfortable with. Slides in a switch can be a bit weird as they are backward from the normal ride.
Learning switch slides can open up many slides up slides to master. So, if you want to master all types of slides and get out of your comfort zone, you should start with switch slides.
180 and 360 Slides:
A 180-degree slide is a slide in which the rider turns to the opposite direction from which he was facing. And in 360-degree, the rider rotates back to the original position. In 3600, you over-rotate a bit.
I have already mentioned the Front-side Stand-up 1800 slide. For the 3600 slides, the techniques are all the same as 1800. Just rotate in such a way that you return to your position.
All slides are possible to master if you practice enough. Each person has a different body type for which the steps might look different from person to person. Try to follow the steps in such a way that are comfortable to you.
Most importantly, follow all safety measures. Though you can slide in any longboard, for extra safety you can choose boards made especially for slides like Landyachtz Switchblade. And most importantly, get good slide gloves if you plan to learn Coleman or Hands-Down slides.
Conclusion
I have mentioned the most basic and popular slides to choose from. Each slide has its own unique feature. Ensure that your wheels are in good shape and not worn out before learning how to slide on a longboard.
I suggest choosing the best sliding technique for yourself by judging your riding style. If you are comfortable with squatting on your longboard Hands-Down slides are the best for you. But if bending too much is troublesome for you, you have many stand-up slides to choose from.
Do not get frightened watching all the cool sliding videos on YouTube. Start with the basics and you will be sliding on your longboard in no time.