
Are you ready to create your very own longboard deck that fits your style and riding needs perfectly? Making a longboard deck by yourself isn’t just a fun project—it gives you control over the shape, size, and feel of your board.
Imagine gliding down the streets of Austin, Texas, on a board you crafted with your own hands. Whether you want a sturdy maple deck for strength or a flexible bamboo one for smooth rides, this guide will walk you through every step.
Stick with me, and you’ll learn how to pick the right materials, shape your deck just right, and finish it like a pro. By the end, you’ll have a custom longboard deck that’s ready to hit the road—and impress your friends too!
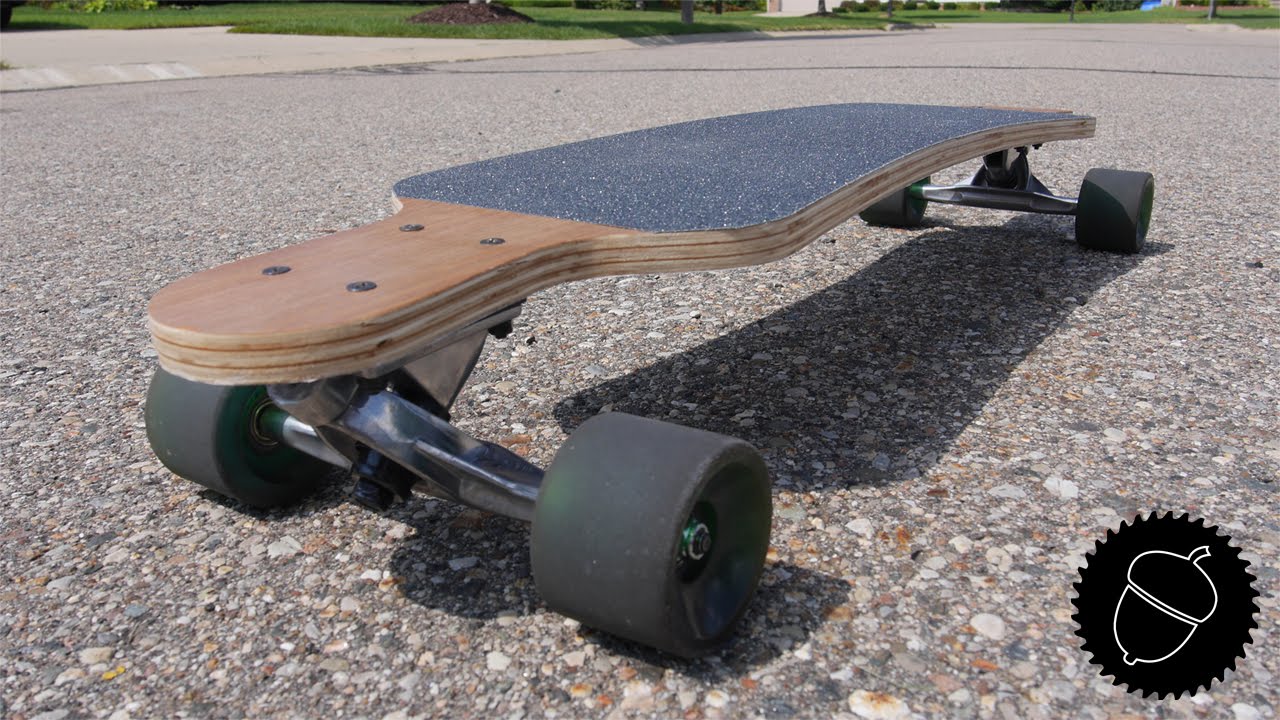
Credit: www.youtube.com
Materials For Longboard Decks
Choosing the right materials for a longboard deck shapes your ride’s feel and durability. Different woods and composites bring unique strengths and weaknesses. Understanding these materials helps you build a deck that matches your style and needs.
Some materials offer strength and stiffness. Others provide lightness and flexibility. Some focus on eco-friendliness. Each option affects your board’s performance on the road or park.
Maple Wood Benefits
Maple wood is tough and reliable. It resists cracks and dents well. Its stiffness gives a stable ride at high speeds. Maple decks hold their shape over time. The wood layers glue tightly, making strong decks. Maple’s weight adds control and balance. This wood suits riders who want durability and a solid feel.
Bamboo Advantages
Bamboo is lighter than maple. It bends more, offering smooth flex. This natural flexibility absorbs road shocks better. Bamboo grows fast, making it sustainable. It often mixes with fiberglass for extra strength. Bamboo decks feel lively and responsive. Ideal for riders preferring lighter, springy boards.
Eco-friendly Options
Eco-friendly decks use sustainable woods or recycled materials. Bamboo ranks high for being renewable. Some brands use hemp or recycled plastics too. These materials reduce environmental impact. They still provide good strength and flexibility. Eco-friendly decks appeal to riders who care about nature. Building with these materials supports greener choices.
Choosing The Right Thickness
Choosing the right thickness for your longboard deck is crucial. It affects how your board feels and performs. Thickness influences the deck’s strength, weight, and flexibility. Picking the correct thickness helps balance durability with comfort. This guide breaks down the basics to help you decide.
Standard Deck Thickness
Most longboard decks range between 7 to 10 millimeters thick. This size suits general riding styles and skill levels. Thinner decks are lighter but less strong. Thicker decks offer more durability but can feel heavy. The standard thickness gives a good mix of these traits. It works well for cruising, carving, and some tricks.
Impact On Flexibility And Strength
Thickness directly changes how a deck bends under pressure. Thin decks flex more, providing a smooth ride on rough surfaces. They absorb shocks better but can snap if overloaded. Thick decks resist bending and support heavier riders or aggressive riding. Stiff decks give more control at high speeds. Choosing thickness depends on your style and weight. Balance flexibility with strength to suit your needs.
Tools And Supplies Needed
Making a longboard deck requires specific tools and supplies. Having the right items ensures your project runs smoothly. Each tool plays a role in shaping, assembling, and finishing the deck. Before starting, gather all essential equipment for best results.
Woodworking Tools
Woodworking tools are the foundation of your build. You need a jigsaw or bandsaw to cut the deck shape. A router helps smooth edges and create contours. Sandpaper or an electric sander polishes the surface for a clean finish. Clamps hold wood layers firmly during glue-up. Measuring tools like a ruler and square keep your cuts accurate.
Adhesives And Finishes
Strong adhesives bond the wood layers securely. Use waterproof wood glue for lasting strength. Finishes protect your deck from water and wear. Apply clear polyurethane or varnish for a shiny, durable coat. Some prefer tung oil for a natural look. Choose finishes that dry fast and resist scratches.
Safety Gear
Safety gear protects you during the build. Wear safety glasses to guard your eyes from dust and debris. Use a dust mask to avoid inhaling wood particles. Gloves keep your hands safe from splinters and glue. Hearing protection is important when using loud power tools. Always work in a well-ventilated area to reduce fumes.

Credit: www.youtube.com
Preparing The Wood Veneers
Preparing the wood veneers is a crucial step in making a longboard deck. The quality and condition of the veneers affect the board’s strength and flexibility. This process includes selecting the right wood, cutting it precisely, and sanding it smoothly. Each step ensures the veneers fit perfectly and bond well during pressing.
Selecting Quality Veneers
Choose veneers made from hardwood like maple or bamboo. Hardwood offers durability and good flex for longboarding. Look for thin, even sheets without cracks or knots. Uniform thickness helps in creating a smooth, strong deck. Avoid veneers with warps to ensure easy gluing and pressing.
Cutting To Size
Cut the veneers to match your longboard mold size. Use a sharp utility knife or saw for clean edges. Precise cutting avoids gaps during layering. Make sure all pieces are the same size for balanced strength. Keep the edges straight to help with the gluing process.
Sanding Techniques
Sand each veneer lightly before assembly. Use fine-grit sandpaper to remove rough spots and splinters. Sanding improves glue adhesion between layers. Avoid sanding too hard to prevent thinning the veneers. Wipe off dust after sanding to keep surfaces clean.
Building The Deck Mold
Building the deck mold is a key step in making a strong longboard deck. The mold shapes the wood layers and defines the board’s curves. A well-built mold ensures the deck is durable and rides smoothly.
This process requires precision and the right tools. Each part of the mold must fit perfectly to create the desired board shape. Careful attention to detail helps prevent flaws during pressing.
Designing The Mold Shape
Start by planning the mold shape based on the longboard design. The shape includes the length, width, and any concave or camber curves. Use simple drawings or software to map out the form. Keep the shape balanced for both stability and control. The design guides all later steps and affects how the deck will perform on the road.
Assembling Mold Components
Gather materials like plywood, MDF, or metal sheets for the mold. Cut the pieces according to the design measurements. Attach the parts firmly using screws, clamps, or glue. Make sure the mold is smooth and even to avoid marks on the deck. Double-check all joints to keep the mold strong during pressing. A sturdy mold lasts longer and produces consistent results.
Using CNC Routers
CNC routers help carve the mold with high accuracy. Load the design file into the CNC machine. The router cuts the mold parts precisely, reducing manual errors. This method saves time and ensures each mold matches the design exactly. After routing, sand the edges for a clean finish. CNC routing works well for complex shapes and repeatable production.

Gluing And Pressing The Deck
Gluing and pressing the deck is a key step in making a strong longboard. This process bonds the wood layers together. It shapes the deck and adds durability. Proper gluing and pressing ensure the board stays solid during rides. Careful attention here leads to a smooth, balanced deck.
Applying Adhesive Evenly
Spread the glue in a thin, even layer on each veneer. Avoid thick spots or gaps. Use a brush or roller for consistent coverage. Even glue distribution helps the layers stick well. This prevents weak spots that could cause cracks later.
Layering Veneers
Place each wood veneer carefully on top of the glued layer. Align edges tightly to avoid gaps. Alternate grain directions for better strength and flexibility. Press each layer down firmly to remove air bubbles. Proper layering builds a solid, flexible deck.
Clamping And Pressing Methods
Use clamps or a press to apply steady pressure on the layered veneers. Keep pressure even across the whole deck. This helps the glue cure properly and bonds the layers tightly. Leave the deck clamped for several hours or overnight. Proper pressing prevents warping and ensures a smooth shape.
Shaping And Cutting The Deck
Shaping and cutting the longboard deck is a vital step in crafting a personalized ride. This process defines the board’s style, balance, and performance. Start with a clear outline of your deck design on the wood. Precision during cutting ensures a smooth and safe longboard.
Trimming Excess Wood
Use a jigsaw or bandsaw to cut along the outline carefully. Remove any extra wood outside the marked shape. Keep your hand steady and follow the line closely. This step sets the foundation for a clean and accurate deck shape. Avoid rushing to prevent splintering or uneven edges.
Cutting Wheel Wells
Wheel wells prevent the wheels from rubbing against the deck. Mark their positions near the trucks with a pencil. Drill starter holes inside each wheel well shape. Then, use a jigsaw to cut out the wells smoothly. Check for enough clearance to allow full wheel movement. Proper wheel wells improve ride quality and safety.
Sanding Edges Smooth
Sand all deck edges to remove roughness and splinters. Begin with coarse sandpaper to shape the edges. Follow with finer grit for a smooth finish. Rounded edges feel comfortable underfoot and reduce chipping. Take time to sand evenly around the entire deck perimeter. A well-sanded deck looks professional and rides better.
Finishing Touches
Finishing touches make your longboard deck look great and last longer. These final steps protect your work and prepare it for riding. Each task adds style and function to your deck. Focus on painting, sealing, applying griptape, and mounting trucks and wheels.
Painting And Sealing
Choose paint that suits wood surfaces. Use thin, even coats for a smooth finish. Let each layer dry fully before the next. Sealing protects the paint and wood from damage. Apply a clear sealant to shield against water and wear. This step keeps your deck strong and vibrant.
Applying Griptape
Cut the griptape to match your deck shape. Peel the backing and carefully stick it on top. Press firmly to avoid bubbles or wrinkles. Trim the edges for a clean look. Griptape gives your feet grip and control. It is essential for safe riding and sharp turns.
Mounting Trucks And Wheels
Align the trucks with the mounting holes on the deck. Tighten the bolts securely but avoid over-tightening. Attach the wheels to the trucks with bearings inside. Check that wheels spin freely and without noise. Proper mounting ensures smooth rides and good board response.
Safety And Legal Tips
Building your own longboard deck is exciting and rewarding. Safety and legal awareness keep your rides safe and fun. Knowing how to protect yourself and follow rules helps avoid accidents and fines.
Before riding your custom longboard, learn important safety measures. Understand local laws that apply to longboarders. Follow best practices for street riding to stay safe and respectful on the road.
Wearing Protective Gear
Always wear a helmet designed for skateboarding. Protect your head from serious injury during falls. Use wrist guards to prevent sprains and fractures. Elbow and knee pads reduce cuts and bruises. Choose gear that fits well and feels comfortable. Wearing protective gear makes riding safer and more confident.
Local Riding Laws
Check your city’s rules about longboarding. Some areas treat longboards like bicycles, others like pedestrians. Follow traffic signals and signs at all times. Ride on bike lanes or paths when they are available. Avoid busy roads and highways with fast traffic. Respect local laws to avoid tickets or fines.
Best Practices For Street Riding
Stay alert and watch for cars and pedestrians. Ride on the right side of the road, with traffic flow. Use hand signals to show turns and stops clearly. Avoid using headphones or phones while riding. Keep your speed controlled, especially on hills and crowded areas. Respect others and share the road safely.
Test Riding Your Longboard
Test riding your longboard is the first real chance to feel how well your deck performs. It shows if the build suits your style and if any tweaks are needed. Taking your board for a spin helps spot issues early and ensures a smooth ride.
Initial Ride Assessment
Start riding on a flat, smooth surface. Check how stable the deck feels under your feet. Notice if the board flexes too much or feels too stiff. Pay attention to turning and stopping. Feel for any strange noises or loose parts. This first ride sets the base for all adjustments.
Adjusting Setup
Make small changes to trucks and wheels based on your test ride. Tighten or loosen trucks to improve turning or stability. Swap wheels if they do not roll smoothly. Adjust grip tape for better foot hold. Each change can greatly affect how the board rides. Test again after each tweak.
Maintenance Tips
Keep your longboard clean to maintain performance. Remove dirt and debris from wheels and bearings. Check screws and bolts regularly for tightness. Replace worn parts like bushings or wheels. Proper care extends the life of your deck and keeps riders safe and fun.
Frequently Asked Questions
What Is The Best Material For A Longboard Deck?
Maple is the best material for longboard decks due to its strength, durability, and solid ride feel. Bamboo offers lighter, flexible, and eco-friendly alternatives. Both materials provide excellent performance for different riding styles.
How Thick Should A Longboard Deck Be?
A longboard deck typically measures 0.25 to 0.5 inches thick. Thicker decks offer more durability and stiffness. Thinner decks provide flexibility and lighter weight. Choose thickness based on riding style and strength preference. Most decks use 7-ply maple for a balance between strength and flex.
What Kind Of Wood Is Used For Longboards?
Maple is the most common wood for longboards due to its strength and durability. Bamboo offers a lighter, flexible, eco-friendly alternative. Both woods provide excellent performance and lasting reliability for riders.
Is It Illegal To Longboard On The Road?
Longboarding on roads depends on local laws; some allow it in bike lanes or treat riders as pedestrians. Always follow traffic rules, wear protective gear, and avoid busy streets for safety. Check your area’s regulations before riding on the road.
Conclusion
Crafting your own longboard deck takes patience and care. Use quality wood like maple or bamboo for strength and flexibility. Follow each step carefully, from cutting to sanding, to get a smooth finish. Take time to paint and add grip tape for safety.
Personalizing your deck makes riding more fun and unique. Enjoy the process and ride safely on your custom longboard.

